Showing posts with label MultiBeast. Show all posts

MultiBeast 4.6 Update


Today MultiBeast was updated to version 4.6 for Lion and is now available at tonymacx86.com/downloads.

In this version we've included a patched AppleIntelCPUPowerManagement for Ivy Bridge CPUs from the MacBook Pro 2012 Update. This will enable full power management on non-Gigabyte 7-Series Socket 1155 motherboards and eliminates the need for NullCPUPowerManagment.kext.

Next up are changes to Realtek audio support. Toleda created two versions of ALC8xxHDA to support both legacy and current versions of the ALC888 and ALC888b/887 codecs. Because of that, we renamed the the menu choice ALC8xxHDA to Unified Device Injector. He also updated his patched AppleHDAs to the latest 10.7.4 versions. With these patched AppleHDAs, he added a new one for the Realtek ALC898 and support for both new and legacy variants of the ALC888 and ALC888b/887 codecs.

Finally, we've added the patched 10.6.8 AppleACPIPlatform Rollback, which prevents kernel panics on 10.7.4 when using ASUS X58 motherboards.

Please do not upload or redistribute MultiBeast to any other sites. 

MultiBeast 4.6 Changes:
  • Updated Chimera to v1.10.0
  • Added AppleACPIPlatform Rollback to Drivers & Bootloaders -> Kexts & Enablers -> Miscellaneous
  • Added OS X 10.7.4 Ivy Bridge to Drivers & Bootloaders -> Kexts & Enablers -> Miscellaneous -> Patched AppleIntelCPUPowerManagement
  • Renamed Bootloaders -> Kexts & Enablers -> Audio -> Realtek ALC8xx -> ALC8xxHDA to Unified Device Injector
  • Added ALC8xxHDA to Drivers & Bootloaders -> Kexts & Enablers -> Audio -> Realtek ALC8xx -> Unified Device Injector
  • Added ALC8xxHDA for Legacy ALC888 and ALC888b/887 to Drivers & Bootloaders -> Kexts & Enablers -> Audio -> Realtek ALC8xx -> Unified Device Injector
  • Changed Drivers & Bootloaders -> Kexts & Enablers -> Audio -> Realtek ALC8xx -> Patched AppleHDA -> ALC887/888b to a menu choice.
  • Renamed Drivers & Bootloaders -> Kexts & Enablers -> Audio -> Realtek ALC8xx -> Patched AppleHDA -> ALC887/888b to ALC888b/887
  • Added v100202 Legacy to Drivers & Bootloaders -> Kexts & Enablers -> Audio -> Realtek ALC8xx -> Patched AppleHDA -> ALC888b/887
  • Added v100302 Current to Drivers & Bootloaders -> Kexts & Enablers -> Audio -> Realtek ALC8xx -> Patched AppleHDA -> ALC888b/887
  • Changed Drivers & Bootloaders -> Kexts & Enablers -> Audio -> Realtek ALC8xx -> Patched AppleHDA -> ALC888 to a menu choice.
  • Added v100202 Legacy to Drivers & Bootloaders -> Kexts & Enablers -> Audio -> Realtek ALC8xx -> Patched AppleHDA -> ALC888
  • Added v100302 Current to Drivers & Bootloaders -> Kexts & Enablers -> Audio -> Realtek ALC8xx -> Patched AppleHDA -> ALC888
  • Renamed Drivers & Bootloaders -> Kexts & Enablers -> Audio -> Realtek ALC8xx -> Patched AppleHDA -> ALC885/889a to ALC889a/885
If you have Bug Reports or Feature Requests, please let us know in the MultiBeast section of the forum. 

-tonymacx86 & MacMan
For discussions on this and other topics, register today at tonymacx86.com!

MultiBeast 4.5 Update

Today MultiBeast was updated to version 4.5 for Lion. The latest version of MultiBeast is now available at tonymacx86.com/downloads.

Please do not upload or redistribute MultiBeast to any other sites. 

What's new in MultiBeast 4.5:
  • Added Customization -> Boot Options -> SSDT
  • Added Core i5 to Customization -> Boot Options -> SSDT
  • Added Core i7 to Customization -> Boot Options -> SSDT
  • Added Core i5/i7 Overclocked to Customization -> Boot Options -> SSDT
  • Added netkas ATI 48xx Patch for 10.7.4 to Graphics -> ATI 48xx Support.
  • Updated ALC8xxHDA to v2.0.3
    • Adds mute for Realtek ALC892
  • Updated Patched AppleHDA for Realtek ALC887 with bug fix
If you have Bug Reports or Feature Requests, please let us know in the MultiBeast section of the forum.

-tonymacx86 & MacMan
For discussions on this and other topics, register today at tonymacx86.com!

MultiBeast 4.4 Update

Today MultiBeast was updated to version 4.4 for Lion. The latest version of MultiBeast is now available at tonymacx86.com/downloads.

Please do not upload or redistribute MultiBeast to any other sites. 

What's new in MultiBeast 4.4:
  • Added toleda's patched AppleHDA's to Drivers & Bootloaders -> Kexts & Enablers -> Audio -> Realtek ALC8xx -> Patched AppleHDA
  • Added ALC898 to Drivers & Bootloaders -> Kexts & Enablers -> Audio -> Realtek ALC8xx -> Non-DSDT HDAEnabler.
  • Added HWMonitor Application to Drivers & Bootloaders -> Kexts & Enablers -> Miscellaneous -> FakeSMC Plugins.
  • Updated Chimera to v1.9.2
  • Updated ALC8xxHDA to v2.0.1
  • Updated FakeSMC to v4.2 rev609
  • Updated FakeSMC Plugins to v4.2 rev609+
    • + designates MacMan's addition of Ivy Bridge CPU detection to this source.
  • Updated hnak's AppleIntelE1000e Ethernet to v1.9.5 and changed install location to /System/Library/Extensions/IONetworkingFamily.kext/Contents/PlugIns.
Special thanks to the Project OS X Team for their continued development of FakeSMC and FakeSMC Plugins, and mozo and Navi for the new HWMonitor App.

If you have Bug Reports or Feature Requests, please let us know in the MultiBeast section of the forum.

-tonymacx86 & MacMan

Related Posts:
For discussions on this and other topics, register today at tonymacx86.com!

Optimizing NVIDIA GeForce 4xx and 5xx Graphics Cards for Mac OS X Lion Using OpenCL and CUDA


Many graphics and video professionals prefer using NVIDIA graphics cards. OpenCL (Open Computing Language) was initially created by Apple to provide applications access to the computing power of the graphics card as well as the CPU. This can dramatically increase the general performance of high-end applications at the OS level, and has become an industry standard. Apple has supported OpenCL since Mac OS X 10.6 Snow Leopard.

Using the latest MultiBeast, all NVIDIA 4xx and 5xx graphics cards can be optimized for Mac OS X Lion. We've included a Combo OpenCL Enabler, that not only patches all device IDs into the native driver, but patches the system to use the power of OpenCL. Earlier NVIDIA (pre-Fermi) models and ATI/AMD cards are OpenCL enabled by default, and do not need any patching. Integrated graphics solutions such as Intel HD 3000 do not support OpenCL.
How to Enable OpenCL for NVIDIA 4xx and 5xx Graphics Cards:

     1. Update to the latest version of Mac OS X Lion
     2. Download MultiBeast
     3. Run Combo OpenCL Enabler
     4. Reboot

NOTE: Only for Mac OS X Lion native drivers with NVIDIA 4xx and 5xx cards. If you've previously installed the official Quadro for Mac drivers for Lion from NVIDIA's site, do NOT run the Combo OpenCL Enabler.


NVIDIA has created a similar but proprietary technology, called CUDA. According to NVIDIA's site, CUDA is "a parallel computing platform that enables dramatic increases in computing performance by harnessing the power of the graphics processing unit (GPU)". NVIDIA's CUDA driver for Mac can be downloaded free from NVIDIA's site here.
It is important to note that both CUDA and OpenCL don't work with every piece of software. The application itself must be coded to support them. Refer to the developer's website for compatibility with these technologies.

Below are some of our top picks for modern NVIDIA cards that can be fully enabled using the new Combo OpenCL Enabler and CUDA. 

GeForce GT 430Amazon  Newegg
GeForce GTS 450Amazon  Newegg
GeForce GTX 460Amazon  Newegg
GeForce GTX 470Amazon  Newegg
GeForce GTX 480Amazon  Newegg 
GeForce GT 520Amazon  Newegg
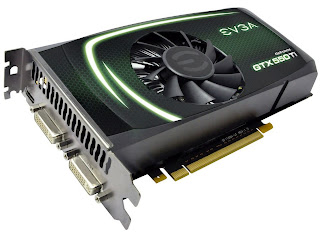
GeForce GTX 550tiAmazon  Newegg
GeForce GTX 560Amazon  Newegg
GeForce GTX 560tiAmazon  Newegg
GeForce GTX 570Amazon  Newegg
GeForce GTX 580Amazon  Newegg

Check out our CustoMac Buyer's Guide for a huge list of alternate graphics cards, parts, and full Sandy Bridge Socket 1155 builds. Good luck, and let us know how it goes!
For discussions on this and other topics, register today at tonymacx86.com!

MultiBeast 4.3 Update

Today MultiBeast was updated to version 4.3 for Lion. We've added a new Combo OpenCL Enabler, which when combined with Chimera 1.8 will enable full QE/CI and OpenCL for all NVIDIA GeForce 4xx and 5xx graphics cards. Two more big additions are the flAked SpeedStepper for UEFI power management fixes, and maolj's Atheros ethernet driver. The latest version of MultiBeast is now available at tonymacx86.com/downloads.
Please do not upload or redistribute MultiBeast to any other sites. 

What's new in MultiBeast 4.3...
  • Updated Chimera to v1.8.0
  • Renamed NVIDIA GF100 Fermi Patches to NVIDIA 4xx/5xx Support
  • Renamed OpenCL Enabler 10.7.0 / 10.7.1 to 10.7.0 / 10.7.1 netkas OpenCL Enabler
  • Removed OpenCL Enabler 10.7.2
  • Added 10.7.2 / 10.7.3 Combo OpenCL Enabler. 
    • This new enabler contains the functionality from the old OpenCL Enabler plus adds cmf's OpenGL patch and MacMan's patch to add the missing NVIDIA device IDs. 
    • NOTE: ONLY for native Apple-released graphics drivers, NOT for the older NVIDIA Official Drivers for Quadro released here.
  • Renamed ATI 48xx Patches to ATI 48xx Support
  • Moved ATI 48xx Device Injector to ATI 48xx Support -> ATI 48xx Device Injector
  • Renamed all ATI 48xx Patch for 10.7.x to 10.7.x netkas ATI 48xx Patch
  • Added 10.7.3 netkas ATI 48xx Patch for 10.7.3 to Graphics -> ATI 48xx Support
  • Added flAked SpeedStepper to Drivers & Bootloaders -> Kexts & Enablers -> Miscellaneous
  • Added maolj's AtherosL1cEthernet to Drivers & Bootloaders -> Kexts & Enablers -> Network
  • Removed OSx86 Software. 
    • The programs in this choice are now available for download here.
  • Added 10.7.2 / 10.7.3 Combo OpenCL Enabler to EasyBeast and UserDSDT installs.
  • Changed npci=0x2000 to npci=0x3000 for all kernel flags.
  • Removed backup function from any script that was backing up and patching kexts.
  • Updated IntelCPUMonitor to v1.0.1 rev505
If this utility has helped you, please consider a contribution to support further MultiBeast development. Thanks in advance, and enjoy! If you have Bug Reports or Feature Requests, please let us know in the MultiBeast section of the forum.

-tonymacx86 & MacMan
For discussions on this and other topics, register today at tonymacx86.com!

MultiBeast Overview Video

Here's a nice video intro to MultiBeast: The Ultimate Post-Installation Utility. Produced and narrated by StingRay. 
For discussions on this and other topics, register today at tonymacx86.com!

MultiBeast 4.2 Update


Today MultiBeast was updated to version 4.2 for Lion. The latest version is now available at tonymacx86.com/downloads

Please do not upload or redistribute MultiBeast to any other sites. 

Full list of changes:
  • Added TRIM Enabler to Drivers & Bootloaders > Kexts & Enablers > Disk
  • Added AppleRTC Patch for CMOS Reset to Drivers & Bootloaders > Kexts & Enablers > Miscellaneous (Only needed for previous installs)
  • Updated Chimera to v1.7.0
  • Updated USB 3.0 kext to v1.0.8
  • Updated FakeSMC Plugins > AMD RADEON Plugin
  • Updated FakeSMC Plugins > NVIDIA Plugin
  • Added AppleRTC Patch for CMOS Reset to EasyBeast
  • Added AppleRTC Patch for CMOS Reset to UserDSDT
  • Added AppleRTC Patch for CMOS Reset to Extension Migration Tool
If this utility has helped you, please consider a contribution to support further MultiBeast development. Thanks in advance, and enjoy!  If you have Bug Reports or Feature Requests, please let us know in the MultiBeast section of the forum.

-tonymacx86 & MacMan
For discussions on this and other topics, register today at tonymacx86.com!

MultiBeast 4.1 Update


Today MultiBeast was updated to version 4.1 for Lion. The latest version is now available at tonymacx86.com/downloads

Please do not upload or redistribute MultiBeast to any other sites. 

Full list of changes:
  • Updated EasyBeast description to include all org.chameleon.Boot.plist options used, all file names and installation locations. 
  • Updated UserDSDT description to include all org.chameleon.Boot.plist options used, all file names and installation locations.
  • Updated each kext description to include the exact file names and installation location.
  • Updated descriptions for Customization -> Boot Options and all sub-choices.
  • Updated description for System Utilities and removed Rebuild Caches as it is no longer relevant in Lion.
  • Replace VoodooPS2Controller and VoodooPS2TrackPad with PS/2 Keyboard/Mouse/Trackpad (32/64-bit)
  • Added ATI 48xx Patch for 10.7.2 from netkas to Graphics
  • Added NVIDIA GF100 Fermi Patches to Graphics
  • Moved NVIDIA Fermi OpenCL Enabler 10.7.0 / 10.7.1 under NVIDIA GF100 Fermi Patches and renamed it OpenCL Enabler 10.7.0 / 10.7.1
  • Added OpenCL Enabler 10.7.2 to Graphics -> NVIDIA GF100 Fermi Patches.
  • Updated Lnx2Mac's RTL81xx Ethernet to v0.0.90
  • Updated Realtek Gigabit Ethernet to v2.0.6 for 10.7
  • Updated Chimera to v1.6.0
  • Updated USB 3.0 kext to v1.0.7
  • Updated 3rdParty SATA to v0.3
  • Updated 3rdParty eSATA to v0.3
  • Added darkwake=0 to EasyBeast and UserDSDT /Extra/org.chameleon.Boot.plist kernel flags.
  • Added UseKernelCache=Yes to EasyBeast and UserDSDT /Extra/org.chameleon.Boot.plist.
  • Added GenerateCStates=Yes and GeneratePStates=Yes to UserDSDT /Extra/org.chameleon.Boot.plist.
  • Changed EasyBeast to boot 64-bit kernel by default.
If this utility has helped you, please consider a contribution to support further MultiBeast development. Thanks in advance, and enjoy!  If you have Bug Reports or Feature Requests, please let us know in the MultiBeast section of the forum.

-tonymacx86 & MacMan
For discussions on this and other topics, register today at tonymacx86.com!

UniBeast: Install Mac OS X Lion Using an All-In-One Bootable USB Drive

Introducing UniBeast- our new tool to create a bootable USB drive from your Mac App Store purchased copy of Install Mac OS X Lion or Apple Store purchased Mac OS X Lion USB Thumb Drive. This all-in-one bootable USB drive can also be used as a rescue boot drive for system recovery.

UniBeast + MultiBeast is the easiest method to do a clean install of Mac OS X Lion or update any Snow Leopard system. The following guide requires no coding, terminal work, or Mac experience of any kind. 

You Will Need


8GB or larger USB Drive

Install Mac OS X Lion Application
OR
Mac OS X Lion USB Thumb Drive
STEP 1: Purchase Mac OS X Lion 
The operating system is not free. There are two ways to purchase your copy of Mac OS X Lion. The simplest way is to download the Application from the Mac App Store. Alternately, the OS X Lion USB Thumb is available online at Apple.com or any Apple Store retail location. 

STEP 2: Create a Bootable USB Drive Using UniBeast
Take a deep breath and take your time- this is pretty simple, but it's easy to miss things if you rush. Follow each step to the letter.

     1. Insert USB drive
     2. Open /Applications/Utilities/Disk Utility
     3. Highlight USB drive in left column
     4. Click Partition tab
     5. Click Current and choose 1 Partition

     6. Click Options...
     7. Choose Master Boot Record
     8. Under Name: type USB (You can rename it later)
     9. Under Format: choose Mac OS Extended (Journaled)
     10. Click Apply then Partition
     11. If using the Install Mac OS X Lion Application, it must be in /Applications folder.
     12. If using the Mac OS X Lion USB Thumb Drive, make sure it's plugged in and mounted.
     13. Download and run UniBeast
     14. Click Continue, ContinueContinue, Agree
     15. At Destination Select, choose USB and click Continue
     16. If using the Mac App Store "Install Mac OS X Lion" App choose that option.
     17. If using the Apple Store "OS X Lion USB Thumb Drive" choose that option.
     18. If using a laptop, choose Laptop Support in addition to one of the above options.
     19. Click Continue
     20. Enter password and click Install

The process will take about 10-15 minutes, depending on system and drive speed, but will show hours. Do not unplug or stop during this time.

STEP 3: Install Mac OS X Lion
You're almost done! All you need to do is boot from the USB drive and install! Your hard drive should be set in BIOS to AHCI mode. For recommended BIOS settings and screenshots, check out iBoot + MultiBeast.

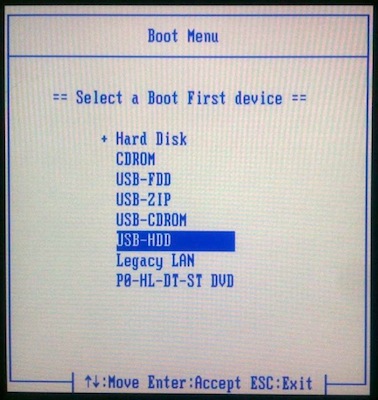
     1. If you have a Gigabyte motherboard press F12 to choose boot device.


     2. Choose USB-HDD
     3. At Chimera Boot Screen, choose USB

You may have to type extra command line flags to reach the installer. 
  • Asus Motherboard + NVIDIA Graphics - type PCIRootUID=0
  • Unsupported graphics - type GraphicsEnabler=No
  • Boot in Single-user mode - type -s
  • Boot in Verbose mode - type -v
  • Boot in Safe mode - type -x

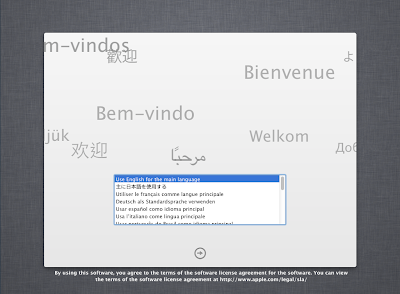
     4. When you arrive at the Installer, choose language.

If updating an existing Snow Leopard install, skip 5-14.

     5. In the top menubar choose Utilities, and open Disk Utility
     6. Highlight your target hard drive for the Lion installation in left column. 
     7. Click Partition tab
     8. Click Current and choose 1 Partition
     9. Click Options...
     10. Choose GUID Partition Method
     11. Under Name: type Lion  (You can rename it later)
     12. Under Format: choose Mac OS Extended (Journaled)
     13. Click Apply then Partition
     14. Close Disk Utility
     15. When the installer asks you where to install, choose Lion, or your existing install.
     16. Upon completion, restart system

The installation is complete, but the drive isn't bootable yet. Boot from the USB again, this time choosing Lion.

     17. If you have a Gigabyte motherboard, press F12 to choose boot device.
     18. Choose USB-HDD
     19. At Chimera Boot Screen, choose your new Lion installation.


STEP 4: Post-Installation Using MultiBeast
MultiBeast is an all-in-one post-installation tool designed to enable boot from hard drive, and install support for Audio, Network, and Graphics. In addition it includes System Utilities to repair permissions and a collection of drivers, bootloaders, config files and handy software.

     1. Complete Mac OS X Lion setup.
     2. When you arrive at desktop, open Safari
Note, if Safari crashes, disable Web Content: Browser Plug-Ins under Preferences>Security.
     3. Browse to tonymacx86.com and log in. If you don't have a user account, create one!
     4. Go to tonymacx86.com/downloads to download the latest MultiBeast
     5. Go to the DSDT Database to download your motherboard's DSDT
     6. Open Downloads folder and move the .aml file to the Desktop
     7. Open and run Multibeast's UserDSDT
     8. Restart system

If your drive doesn't boot on its own, and you get an error referencing boot0, fix it using the methods listed here.


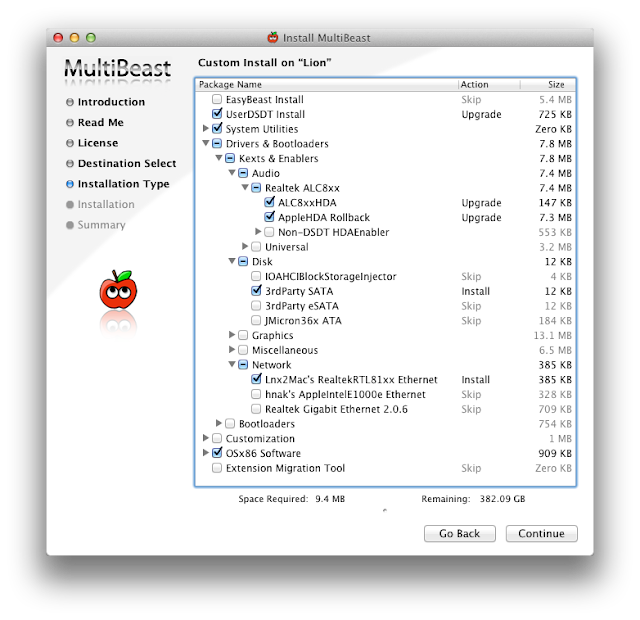
The above photo will provide general post-installation support for any recommended CustoMac build

You may also use MultiBeast to install further drivers to enable ethernet, sound, graphics, etc... Be sure to read the documentation provided in MultiBeast Features.pdf about each option. Both UserDSDT and EasyBeast install the proper bootloader by default, so you'll not need to check that option.

Congratulations!


You now have a fully updated bootable version of Mac OS X Lion on your CustoMac! And a handy USB rescue drive to boot from in case things go pear-shaped. It's easy to get frustrated, but don't give up! If you get stuck, there are many users with similar hardware in the tonymacx86 Forum to provide support. Special thanks to everyone in the community, and our Mods for testing!

If you've had success using this guide, consider a contribution to help keep the sites going. We're constantly updating and tweaking our tools to help you.

Good luck and have fun!

-tonymacx86 & MacMan

Related Posts: 

For discussions on this and other topics, register today at tonymacx86.com!