How To Get iBoot Functionality From MultiBeast

One of the top questions on the forum these days seems to be how to get the functionality of iBoot when booting from the hard drive. For novices, it seems like the process ends after the Combo Update. But iBoot was designed as an installation tool only- not as a permanent solution for post-installation. It is NOT a boot crutch. By using it as such, you are limiting the functionality and upgradeability of your system. Fortunately, MultiBeast contains the same drivers and files as iBoot and can allow most things to work without using a DSDT.

We created MultiBeast to solve the post-installation problem. When installed, the following MultiBeast options will allow boot from a 1 TB or less hard drive or partition, universal audio, network, and graphics. These are not the only drivers available, and may not give optimized performance. However, these options will allow you to be rid of iBoot as a boot crutch.

ATI Graphics


NVIDIA Graphics
Good luck, and see you on the forum!

-tonymacx86 & MacMan
For discussions on this and other topics, register today at tonymacx86.com!

MultiBeast 3.3 Update


Today MultiBeast was updated to version 3.3.  The latest version is now available at tonymacx86.com/downloads.

Please do not upload or redistribute MultiBeast to any other sites. 

Full list of changes:
  • Replaced ElliottForceLegacyRTC with LegacyAppleRTC in EasyBeast  
  • Updated Chameleon 2.0 RC5 - ATI Experimental to r748
  • Fixed HDAEnabler for ALC888 as it was 32-bit only, unlike the rest which were 32/64-bit.
  • Renamed all HDAEnablers to include the codec it enables: HDAEnabler888, HDAEnabler888b, HDAEnabler889, HDAEnabler889a and HDAEnabler892.
  • Added to Customization -> Boot Options -> Chameleon Instant Menu. Adds Instant Menu=Yes or replaces Timeout=n in /Extra/com.apple.boot.plist 
If this utility has helped you, please consider a contribution to support further MultiBeast development.  Thanks in advance, and enjoy!

-tonymacx86 & MacMan

For discussions on this and other topics, register today at tonymacx86.com!

iBoot 2.7 Update


Today, iBoot has been updated to 2.7.  Grab the latest version at tonymacx86.com/downloads.
  • Updated bootloader to Chameleon 2.0 RC5 r748 ATI Experimental (Kabyl Branch).  To clarify, this version works with both NVIDIA and ATI cards.
  • Replaced Intel82566MM.kext with AppleIntelE1000e.kext.
  • Replaced ElliottForceLegacyRTC.kext with LegacyAppleRTC.kext for compatibility with Intel boards.
    Please do not upload or redistribute iBoot to any other sites.  

    If this utility has helped you, please consider a contribution to support further iBoot development.  Thanks in advance, and enjoy!

    -tonymacx86 & MacMan

    For discussions on this and other topics, register today at tonymacx86.com!

    Create a Chameleon USB Rescue Drive Using MultiBeast

    It's always a good idea to keep a copy of iBoot on hand in case things go wrong with your install. You can easily boot from it and then choose your system drive.  But what happens when you don't have access to an optical drive?  Things can get complicated. Here's a guide that will help you install Chameleon and other necessary files on any USB flash drive.

    PLEASE NOTE: USB Rescue drives will NOT boot the Mac OS X Retail DVD.  You will need an optical drive to do an installation using iBoot + MultiBeast.

    YOU WILL NEED
    • A blank USB drive of any size- even an old 512mb one will work!
    • A computer running Mac OS X
    • MultiBeast
    • Your motherboard-specific DSDT from the DSDT Database
    STEP 1: FORMAT THE USB DRIVE
    1. Boot into your existing Mac OS X Installation.
    2. Insert your USB drive.
    3. Open Applications/Utilities/Disk Utility
    4. Highlight your USB drive in the left column.
    5. Click the Partition Tab.
    6. Click Volume Scheme- choose 1 Partition
    7. Click Options…
    8. Select GUID Partition Table. Click OK.
    9. In the Name: field type: USB Rescue
    10. In Format: field select Mac OS Extended (Case Sensitive, Journaled)
    11. Click Apply, then click Partition.
    STEP 2: DOWNLOAD YOUR MOTHERBOARD'S DSDT
    1. Visit the DSDT Database
    2. Download your motherboard's DSDT, and place the .aml file on the Desktop
    STEP 3: RUN MULTIBEAST ON THE USB DRIVE
    1. Open MultiBeast
    2. In Select a Destination screen, choose USB Rescue (If you don't get this option,  press Continue, then select Change Install Location...)
    3. Select UserDSDT
    4. Click Continue, then Install
    There you have it!  A Chameleon USB Rescue drive!  If you ever need to boot from it, go to your computer's boot menu at startup (F12 on Gigabyte boards) and choose the USB drive. When you get to the Chameleon boot screen, choose your system drive. If you have any issues booting your hard drive, you can always use -s to enter single-user mode to modify and repair disk, -x to enter safe mode, or -v for verbose mode.

     -tonymacx86 & MacMan
    For discussions on this and other topics, register today at tonymacx86.com!

    Building a CustoMac: Three Updated LGA 1156 Builds for OS X

    By request, here are three updated builds, based on the original CustoMac post from June 2010.  These builds are our most current 1156 recommendations for fully compatible budget builds running Mac OS X as the primary operating system.  

    All three builds include:
    • Gigabyte LGA 1156 Motherboard
    • Intel Core i-series Quad-Core CPU
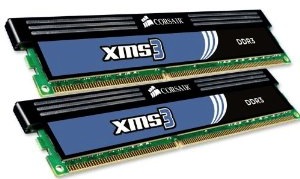
    • 4GB or 8GB of RAM, expandable up to 16GB
    • 1 TB Hard Drive
    • CD/DVD Burner
    • Case and Power Supply
    • Mac OS X Snow Leopard Retail DVD
    We've included all components besides monitor, as any standard monitor will do.  You can use these recommendations as a jumping off point for further customization, or as a shopping list.  Prices reflect those as of February 2011, and do not include shipping or tax. 

    Budget Power Build 1
    Core i5-760 / Gigabyte GA-H55M-UD2H / GeForce GT 240 / 4GB DDR3 RAM
    $683.88

    Motherboard:  GA-H55M-UD2H $94.99


    Hard Drive: Samsung Spinpoint 1 TB $62.99

    CD/DVD Burner: Sony Optiarc Black $36.95

    Power Supply: Antec 550W Continuous Power $64.99

    Operating System: Mac OS X Snow Leopard $29.00

    Budget Power Build 2
    Core i7-870 / Gigabyte GA-H55M-UD2H / Radeon HD 5770 / 4GB DDR3 RAM
    $991.23


    Motherboard:  GA-H55M-UD2H $94.99


    Hard Drive: Samsung Spinpoint 1 TB $62.99

    CD/DVD Burner: Sony Optiarc Black $36.95

    CPU Cooler: Scythe Mugen 2 $47.35

    Power Supply: Corsair 650HX Modular 650W $119.99

    Operating System: Mac OS X Snow Leopard $29.00

    Budget Power Build 3
    Core i7-870 / Gigabyte GA-P55A-UD3 / Radeon HD 5870 / 8GB DDR3 RAM
     $1211.41

    Motherboard: Gigabyte GA-P55A-UD3 $130.22

    Graphics: Diamond ATI Radeon HD 5870 1GB $234.99

    Hard Drive: Samsung Spinpoint 1 TB $62.95
    CD/DVD Burner: Sony Optiarc Black $36.95

    CPU Cooler: Scythe Mugen 2 $47.35
    Case: Antec 900 $99.99

    Power Supply: Corsair 650HX Modular 650W $119.99

    Operating System: Mac OS X Snow Leopard $29.00

    Optional Accessories
    NOTE: Only MODEL NO: ACB10us v1.0 will wake from sleep.

    Oh, and don't forget, if you end up buying anything, click through one of the links above, or in the sidebar.  That way, you'll be supporting the site, as well as getting the best prices.  Thanks in advance!   

    For discussions on this and other topics, register today at tonymacx86.com!